Lets get one thing straight, right off the bat. There is a difference between custom and customized. If I take a stock ring, add some heads for stones, I have customized that ring. That is not a custom ring. There are times when a customized ring is what you want. That is perfectly fine. I can do that, and will tell you that that is what you want. There is no reason to reinvent what is currently made.
A custom ring is a unique piece that is built just for you. Custom pieces each have their own story and it is special to the owner. That is the way it should be. The following are the steps a custom ring goes through.
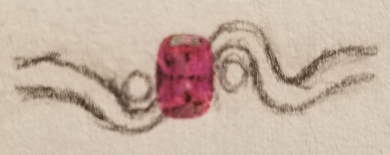
The process starts with a consultation. That usually lasts one hour. In that time, I will ask many questions. What type of work do you do? What is the jewelrys function? What metal are you thinking about? And so on. At the end, I can usually sketch a simple drawing for you to see. In the sketch below I asked which side was prefered. It was the right, with an addition of a bar.
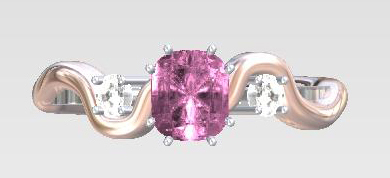
After the sketching is formalized, then I make up a CAD drawing. This shows in real proportions how the piece will look. There are limitations to what is seen and I always explain the variations, between the pictures and the real product. One that always gets ask is the prongs sticking straight up. That is for the casting process, so that the prongs are long enough to set the stones properly.
Once my clients agree to the piece, it gets printed with a 3d printer.
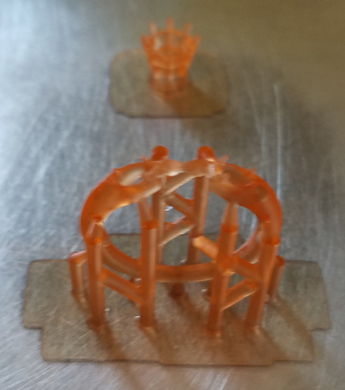
If you’re paying attention, yes, this is a different ring from the sketch and CAD drawing. From this printed model, it can get cast. Using the lost wax casting method. The support pieces that are needed in the printing process are removed. In place is what we call a sprue. It allows the model material to leave in the burn out process “lost wax” and a way for the metal to enter. The model is placed inside a stainless steel cylinder and filled with a special plaster of paris like material. After it dries, it is placed into a burnout oven, where it reached temperatures of 1350 degrees F. This hardens the material for its next step.
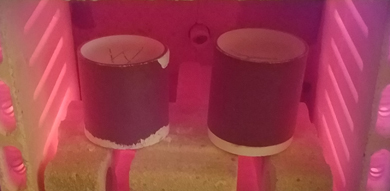
After hours in the oven, the model is completely gone and the material hardened. It is ready for the metal. There are several ways to get the metal into the cavity. I use a vacuum table that pulls the metal in from the top and fills the cavity. Everything has to be perfect. The temperatures are critical, and timing is esencial. Any mistake and you start over from the beginning.
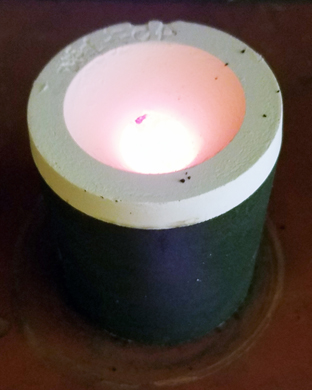
Once the molten metal has cooled, that white hot turns slightly gray. It is then that the cylinder can be quenched in water. This dissolves the supporting material and leaves us with the casting.
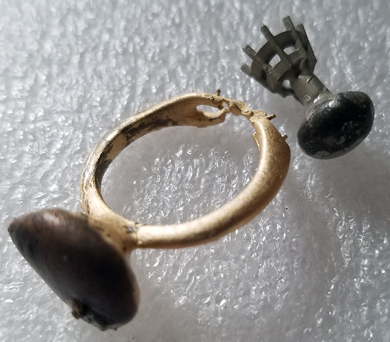
The sprue is trimmed off, and the polishing process begins. In this case, it is two pieces of white and yellow gold.
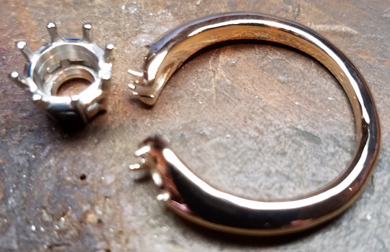
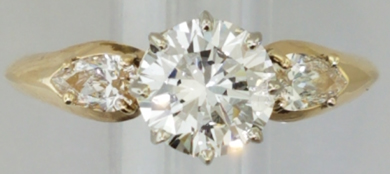
Once the piece gets to this point, it can be assembled. Then it is polished again. Finally set with the stones.
Are you ready to start the adventure of a custom piece of jewelry? If so, use the contact page and let’s create something special.